Spring 4 MVC Hello World Tutorial Using Maven
In this tutorial we build the smallest useful Spring MVC application: a controller that reads a request parameter and renders it in a JSP view. It is the classic “Hello World”, but the wiring it shows (a DispatcherServlet, a bean configuration, and a view resolver) is the same wiring every larger Spring MVC application is built on.
Note: This tutorial has been updated for Spring Framework 7. It was originally written in 2014 for Spring 4 and the
javax.*servlet API; the configuration below now uses thejakarta.*namespace, drops the Eclipse-specific setup for a plain Maven command, and runs on Jakarta EE 11 (Tomcat 11+). We keep XML configuration andweb.xmlso every piece of the wiring stays visible. The same beans map one-to-one onto a@Configurationclass if you prefer Java config.
Technologies used:
- Spring Framework 7.0.8
- Java 17
- Tomcat 11 (Jakarta EE 11, Servlet 6.1)
- Maven 3.9
Creating the Project
Spring MVC needs no IDE-specific tooling: a plain Maven web project is enough. Generate one with the webapp archetype:
mvn archetype:generate \
    -DarchetypeGroupId=org.apache.maven.archetypes \
    -DarchetypeArtifactId=maven-archetype-webapp \
    -DarchetypeVersion=1.5 \
    -DgroupId=com.happystudio \
    -DartifactId=spring \
    -Dversion=1.0.0-SNAPSHOT
This lays out the standard web project: a pom.xml, src/main/webapp/WEB-INF/web.xml, and an index.jsp. Import it into any IDE (IntelliJ IDEA, Eclipse, VS Code) as a Maven project, or stay on the command line; the rest of this tutorial only touches files, not menus.
Maven Dependencies
Replace the generated dependency list with the following pom.xml:
<project xmlns="http://maven.apache.org/POM/4.0.0"
    xmlns:xsi="http://www.w3.org/2001/XMLSchema-instance"
    xsi:schemaLocation="http://maven.apache.org/POM/4.0.0 https://maven.apache.org/xsd/maven-4.0.0.xsd">
    <modelVersion>4.0.0</modelVersion>
    <groupId>com.happystudio</groupId>
    <artifactId>spring</artifactId>
    <packaging>war</packaging>
    <version>1.0.0-SNAPSHOT</version>
    <name>Spring MVC Tutorial</name>

    <properties>
        <maven.compiler.release>17</maven.compiler.release>
        <project.build.sourceEncoding>UTF-8</project.build.sourceEncoding>
        <spring.version>7.0.8</spring.version>
    </properties>

    <dependencies>
        <!-- Spring MVC; pulls in spring-core, spring-web and spring-context transitively -->
        <dependency>
            <groupId>org.springframework</groupId>
            <artifactId>spring-webmvc</artifactId>
            <version>${spring.version}</version>
        </dependency>

        <!-- Provided by the servlet container (Tomcat 11+) -->
        <dependency>
            <groupId>jakarta.servlet</groupId>
            <artifactId>jakarta.servlet-api</artifactId>
            <version>6.1.0</version>
            <scope>provided</scope>
        </dependency>
    </dependencies>

    <build>
        <finalName>spring</finalName>
    </build>
</project>
The whole app needs exactly one Spring dependency. spring-webmvc transitively brings in spring-core, spring-web and spring-context, so the original list of four separate Spring artifacts collapses to one. The Servlet API is marked provided because Tomcat supplies it at runtime. Bundling it into the WAR would clash with the container’s own copy. Everything now targets the jakarta.* namespace, the single biggest change since 2014, when Spring still built on javax.servlet.
Web Application Descriptor
web.xml is the servlet container’s entry point. Put this at src/main/webapp/WEB-INF/web.xml:
<?xml version="1.0" encoding="UTF-8"?>
<web-app xmlns="https://jakarta.ee/xml/ns/jakartaee"
    xmlns:xsi="http://www.w3.org/2001/XMLSchema-instance"
    xsi:schemaLocation="https://jakarta.ee/xml/ns/jakartaee https://jakarta.ee/xml/ns/jakartaee/web-app_6_0.xsd"
    version="6.0">
    <display-name>Spring MVC Tutorial</display-name>

    <!-- One DispatcherServlet loads the Spring context and handles every request -->
    <servlet>
        <servlet-name>dispatcher</servlet-name>
        <servlet-class>org.springframework.web.servlet.DispatcherServlet</servlet-class>
        <init-param>
            <param-name>contextConfigLocation</param-name>
            <param-value>/WEB-INF/dispatcher-servlet.xml</param-value>
        </init-param>
        <load-on-startup>1</load-on-startup>
    </servlet>
    <servlet-mapping>
        <servlet-name>dispatcher</servlet-name>
        <url-pattern>/</url-pattern>
    </servlet-mapping>
</web-app>
Two things changed from the 2014 version. The namespace moved from java.sun.com/xml/ns/javaee to jakarta.ee/xml/ns/jakartaee, and the descriptor version is now 6.0. And rather than register a ContextLoaderListener plus a servlet that loaded the same XML twice, a single DispatcherServlet owns the only application context; for a one-servlet app the root context was always redundant. <load-on-startup>1</load-on-startup> builds that context when Tomcat starts instead of on the first request, and mapping the servlet to / makes it the front controller for the whole app.
Spring Configuration
This file configures the DispatcherServlet’s context. It lives at /WEB-INF/dispatcher-servlet.xml:
<beans xmlns="http://www.springframework.org/schema/beans"
    xmlns:mvc="http://www.springframework.org/schema/mvc"
    xmlns:context="http://www.springframework.org/schema/context"
    xmlns:xsi="http://www.w3.org/2001/XMLSchema-instance"
    xsi:schemaLocation="http://www.springframework.org/schema/beans
        https://www.springframework.org/schema/beans/spring-beans.xsd
        http://www.springframework.org/schema/mvc
        https://www.springframework.org/schema/mvc/spring-mvc.xsd
        http://www.springframework.org/schema/context
        https://www.springframework.org/schema/context/spring-context.xsd">

    <!-- Discover @Controller beans under this package -->
    <context:component-scan base-package="com.happystudio.spring.controller" />

    <!-- Enable annotation-driven MVC (@GetMapping, @RequestParam, ...) -->
    <mvc:annotation-driven />

    <!-- Resolve a view name like "helloworld" to /WEB-INF/views/helloworld.jsp -->
    <bean class="org.springframework.web.servlet.view.InternalResourceViewResolver">
        <property name="prefix" value="/WEB-INF/views/" />
        <property name="suffix" value=".jsp" />
    </bean>
</beans>
<context:component-scan> tells Spring to scan the controller package and register any @Controller it finds, so you never declare controllers as beans by hand. <mvc:annotation-driven> switches on the annotation-based programming model (@GetMapping, @RequestParam and friends), which is best made explicit. The InternalResourceViewResolver turns the name a controller returns into a real file: return "helloworld" and it renders /WEB-INF/views/helloworld.jsp. Note that the schema URLs are now unversioned https links, so the same configuration keeps validating as you bump Spring.
The Controller
Spring has supported annotation-based controllers since Spring 3, so the controller is a plain class with a couple of annotations. This one echoes back a request parameter:
package com.happystudio.spring.controller;

import org.springframework.stereotype.Controller;
import org.springframework.ui.Model;
import org.springframework.web.bind.annotation.GetMapping;
import org.springframework.web.bind.annotation.RequestParam;

@Controller
public class HelloWorldController {

    @GetMapping("/hello")
    public String hello(
            @RequestParam(value = "name", required = false, defaultValue = "World") String name,
            Model model) {
        model.addAttribute("name", name);
        return "helloworld";
    }
}
@Controller marks the class so component-scan picks it up. @GetMapping("/hello") maps HTTP GET requests for /hello to this method. It is the modern shorthand for the original @RequestMapping("/hello"), which matched every HTTP method indiscriminately. @RequestParam binds the query-string parameter name onto the argument; required = false plus a defaultValue means /hello with no parameter still works and greets the world. The method puts name on the Model and returns the view name helloworld, which the resolver expands to helloworld.jsp.
The View
The view lives at src/main/webapp/WEB-INF/views/helloworld.jsp:
<%@ page language="java" contentType="text/html; charset=UTF-8" pageEncoding="UTF-8" %>
<!doctype html>
<html lang="en">
<head>
    <meta charset="UTF-8">
    <title>Spring MVC Tutorial</title>
</head>
<body>
    <h1>Hello : ${name}</h1>
</body>
</html>
${name} is an EL expression that reads the name attribute the controller put on the model. Keeping JSPs under WEB-INF means the container won’t serve them directly; they’re only reachable through the controller. On Tomcat 11 these are Jakarta Pages, but the page directive and EL syntax are unchanged from the JSP you would have written in 2014.
Running the Application
Build the WAR:
mvn package
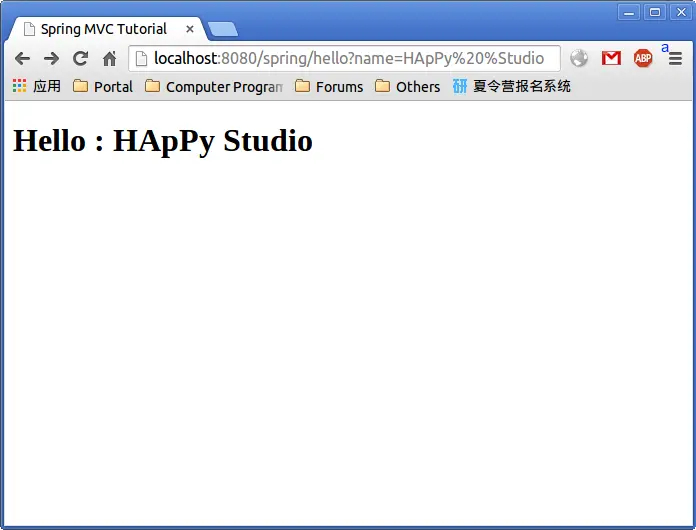
This produces target/spring.war. Drop it into Tomcat’s webapps/ directory (or deploy it from your IDE), and the application is served under the /spring context. Visiting
http://localhost:8080/spring/hello?name=Spring%207
greets you by name, while http://localhost:8080/spring/hello falls back to the default and renders Hello : World:
Conclusion
A dozen lines of XML and a four-line controller are all Spring MVC needs to turn an HTTP request into a rendered page. Every larger application keeps the same shape (a DispatcherServlet out front, beans discovered by component-scan, a view resolver mapping names to templates) and grows by adding controllers, services, and richer views. From here you might swap the JSP for Thymeleaf, return JSON with @RestController, or move the XML into a @Configuration class once the wiring feels familiar.
The Disqus comment system is loading ...
If the message does not appear, please check your Disqus configuration.